

When a large Hyper-V infrastructure is deployed, often Virtual Machine Manager (VMM) is installed. It enables to deploy logical switches which are mainly VM Switches and virtual network adapters for Live-Migration, Backup, heartbeat, storage or management purposes. However small or medium business doesn’t necessarily implement VMM because it is expensive or not well-known. Even if you don’t use VMM, you can deploy consistency VM Switches on several Hyper-V by using PowerShell. This topic aims to show you how to deploy VM Switches and virtual network adapters by using PowerShell. In this way you will be able to make a standard script to configure your Hyper-V hosts.
Manage a teaming
The teaming may be necessary if you want a highly available environment

When a large Hyper-V infrastructure is deployed, often Virtual Machine Manager (VMM) is installed. It enables to deploy logical switches which are mainly VM Switches and virtual network adapters for Live-Migration, Backup, heartbeat, storage or management purposes. However small or medium business doesn’t necessarily implement VMM because it is expensive or not well-known. Even if you don’t use VMM, you can deploy consistency VM Switches on several Hyper-V by using PowerShell. This topic aims to show you how to deploy VM Switches and virtual network adapters by using PowerShell. In this way you will be able to make a standard script to configure your Hyper-V hosts.
Manage a teaming
The teaming may be necessary if you want a highly available environment.
Get Physical NIC information
Before creating any VM Switches, you need to obtain the physical network adapters information. For that, you can use the PowerShell cmdlet called Get-NetAdapter.
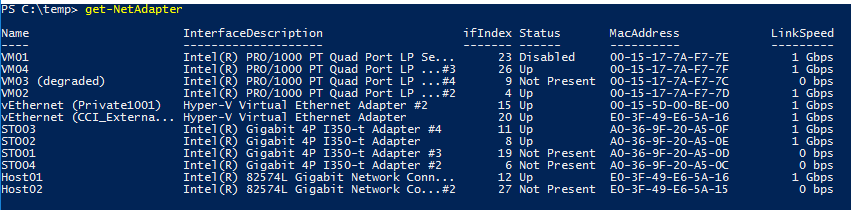
Now that I have details about my physical network adapters, I will make a filter to show only the network adapters I want to add to a teaming and select relevant information.

Create the teaming
To create the teaming, I use the command New-NetLbfoTeam as below:


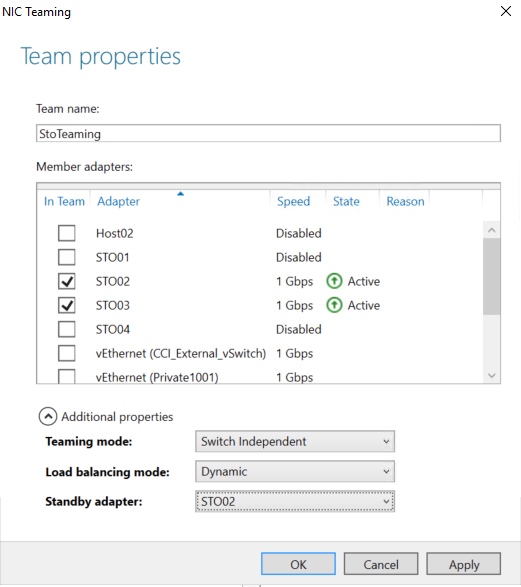
If I open the Server Manager, you can see the teaming well created:
Add / Remove NIC from teaming
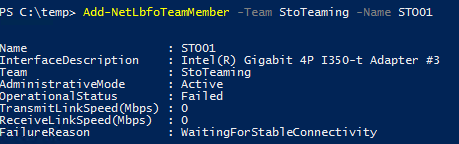
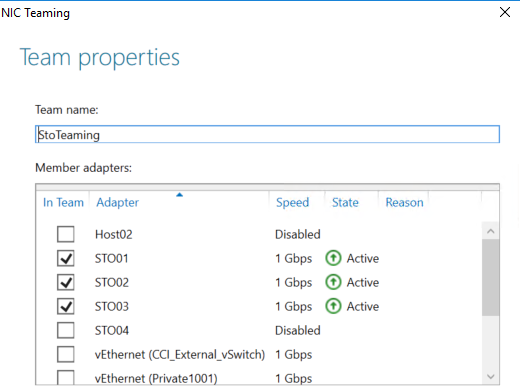
To add a NIC to the teaming, just use Add-NetLbfoTeamMember cmdlet as below. In the below example I add the STO01 network adapter to the teaming that I have just created.
To remove the NIC from the teaming just use Remove-NetLbfoTeamMember cmdlet:
![]()
Manage the VMSwitch
Create the VMSwitch
Now that your teaming is created, you can create the VMSwitch. The teaming is not a prerequisite to deploy a VMSwitch. But in production, usually a teaming is created to avoid single point of failure. To create a VM Switch, you can use the New-VMSwitch command. With this command you can create External, Internal or Private switch. In the below command, I create an external VMSwitch with the teaming previously created:

If you want to create a private or an internal VMSwitch, specify the -SwitchType Internal/Private argument in the New-VMSwitch command. You can also enable SR-IOV by specifying -EnableIov.
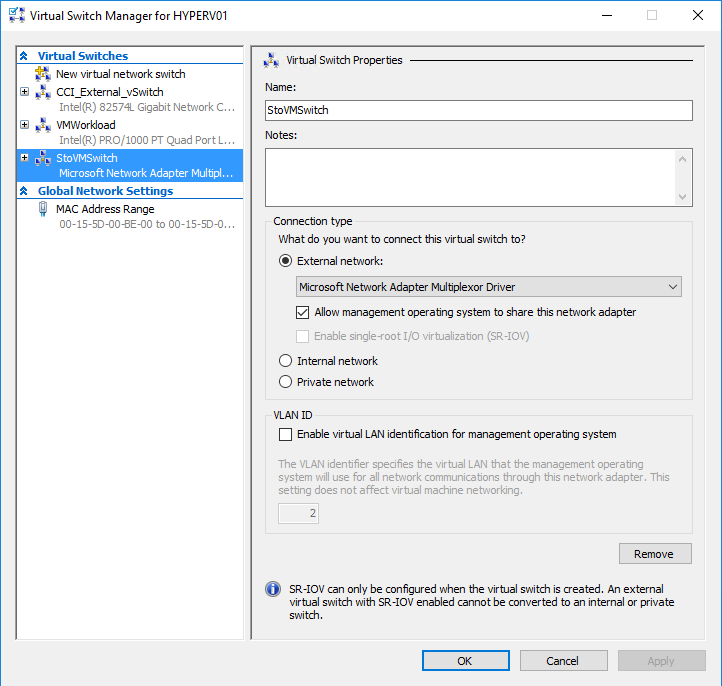
Modify VMSwitch configuration
You can change some settings in the VMSwitch configuration with the command Set-VMSwitch. This command allows you to change the switch type, the connected network adapter and so on.
![]()
Manage virtual Network Adapters
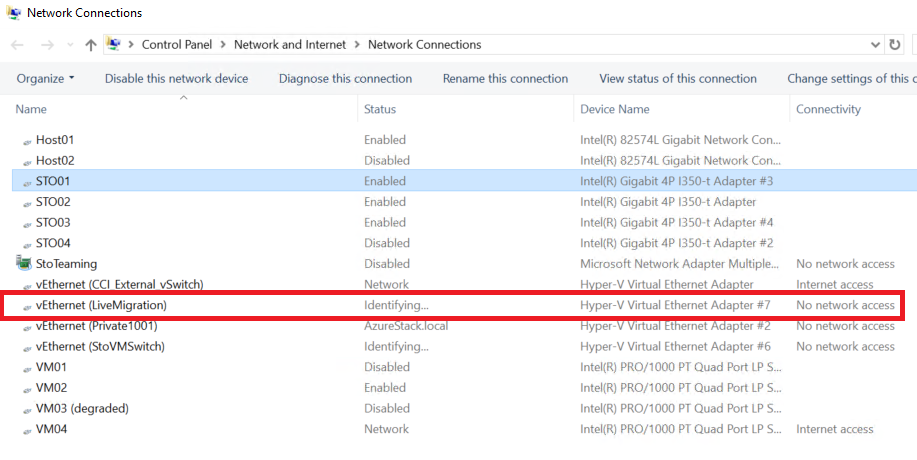
Add a virtual NICs
Now that the VMSwitch is created, you can create vNICs connected to this VMSwitch. For example, when you create a VMSwitch for Hyper-V management usage, usually you need to create vNICs for Live-Migration, Management, cluster heartbeat and so on. To create a vNIC, you can use the command Add-VMNetworkAdapter as below:

When the vNIC is created I can have information about it with PowerShell by using the Get-VMNetworkAdapter command (don’t forget -ManagementOS for parent partition vNIC):

Change the VLAN configuration
When you implement network convergence, you have to configure the VLAN for each vNIC that you have added to a VMSwitch. To get the VLAN configuration of each vNIC that you have created, you can use Get-NetworkAdapterVLAN as below:

To change the VLAN configuration, you can use Set-VMNetworkAdapterVLAN cmdlet:

Now my LiveMigration vNIC is set to tag packet with VLAN ID 200. You can also set a vNIC to trunk mode by specifying the native VLAN and a list of allowed VLAN.
Example: Script to configure management networks
The below script create a teaming, a VMSwitch, vNICs and set the VLAN. It can be useful to deploy several Hyper-V and make a consistent configuration.
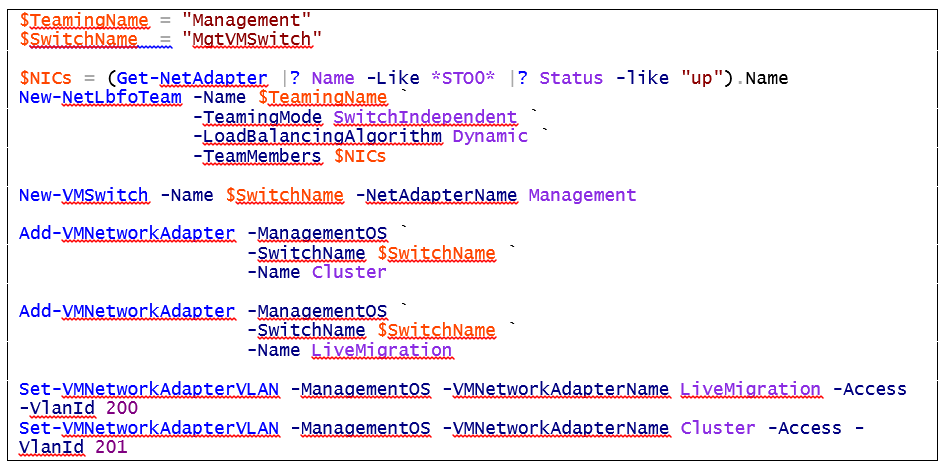
You can add other settings to this script as VMQueue or RSS configuration. By using a script to configure all your Hyper-V environment, you are sure that all configuration is the same.
